
Photoshoot Process: Using Mini Figures to Give Sense of Scale
Sometimes I get an idea for a photo shoot and can’t get it out of my head until I do it. In this case, I got an idea for a photo of a miniature construction crew swapping out the SD card on a giant camera. I purchased a set of 1:87 scale figures that are typically used in model train sets. I wanted to make the world look both big and tiny in one photo. Here is how I thought of, planned for, and completed this shoot all in one day.
The idea for this came to me in the middle of a long editing session for a shoot I had done earlier that week. Once I thought of the idea, I could not concentrate on my editing because I wanted to make this vision a reality so bad. I gave myself plenty of time to finish up the edit for the client shoot, so I decided that instead of trying to continue editing without my full attention, I would spend the rest of the day doing this “SD card construction crew shoot”. It did indeed, take the REST of the day to complete.
Making The Set
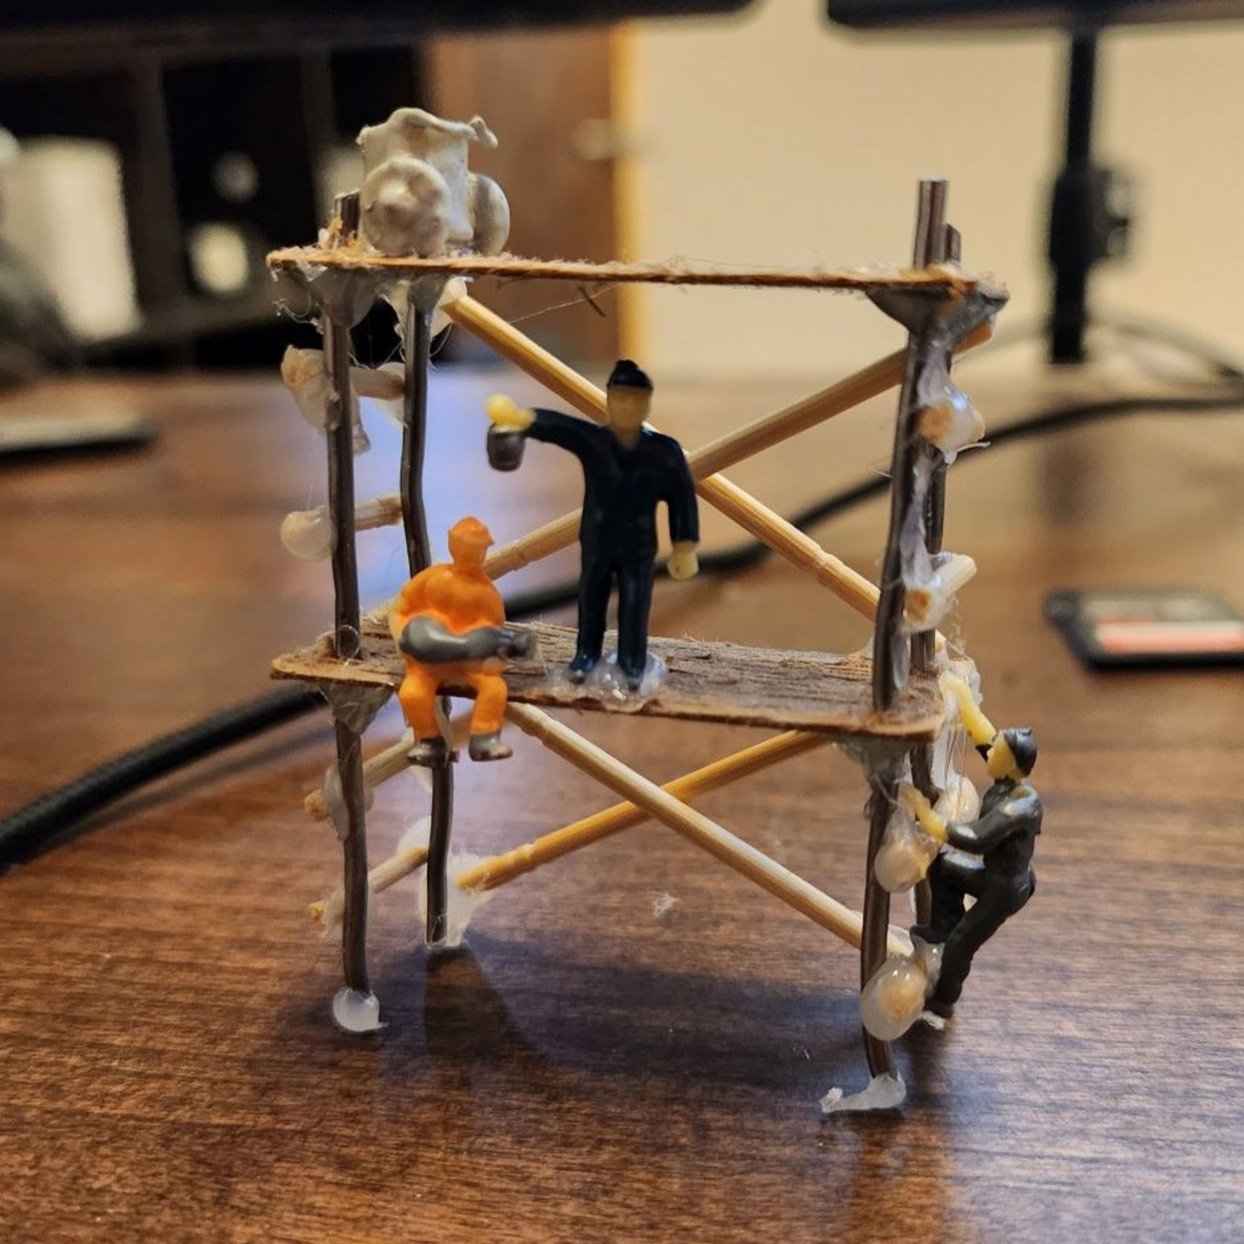
To really sell the idea of this being a construction site, I wanted to create a miniature set of scaffolding. I found a bunch of materials that I could use to do this. For the platforms on the scaffolding I would use cardboard. For the “legs” of the scaffolding providing the structural frame, I would use 4 pieces of solder wire cut to the same length. I would use cut up toothpicks to make cross-beams and ladders to make it really look like construction scaffolding. Lastly, I’d use hot glue to hold it all together. I will NEVER be using hot glue for projects like this in the future and you (and me from the past) will find out why later.
I used thin pieces of carboard, specifically from a Club cracker box, and scraped along them with an x-acto knife to create some texture making them look like tiny planks of wood. I then used the x-acto knife like a caveman would start a fire to “drill” holes in the corners of each piece of cardboard. The pieces of solder wire went through each hole to form the frame of the scaffolding. I then cut up pieces of toothpick and glued them on as seen in the picture. You can probably already see from the pictures that there is hot glue everywhere, but wait, it gets worse.


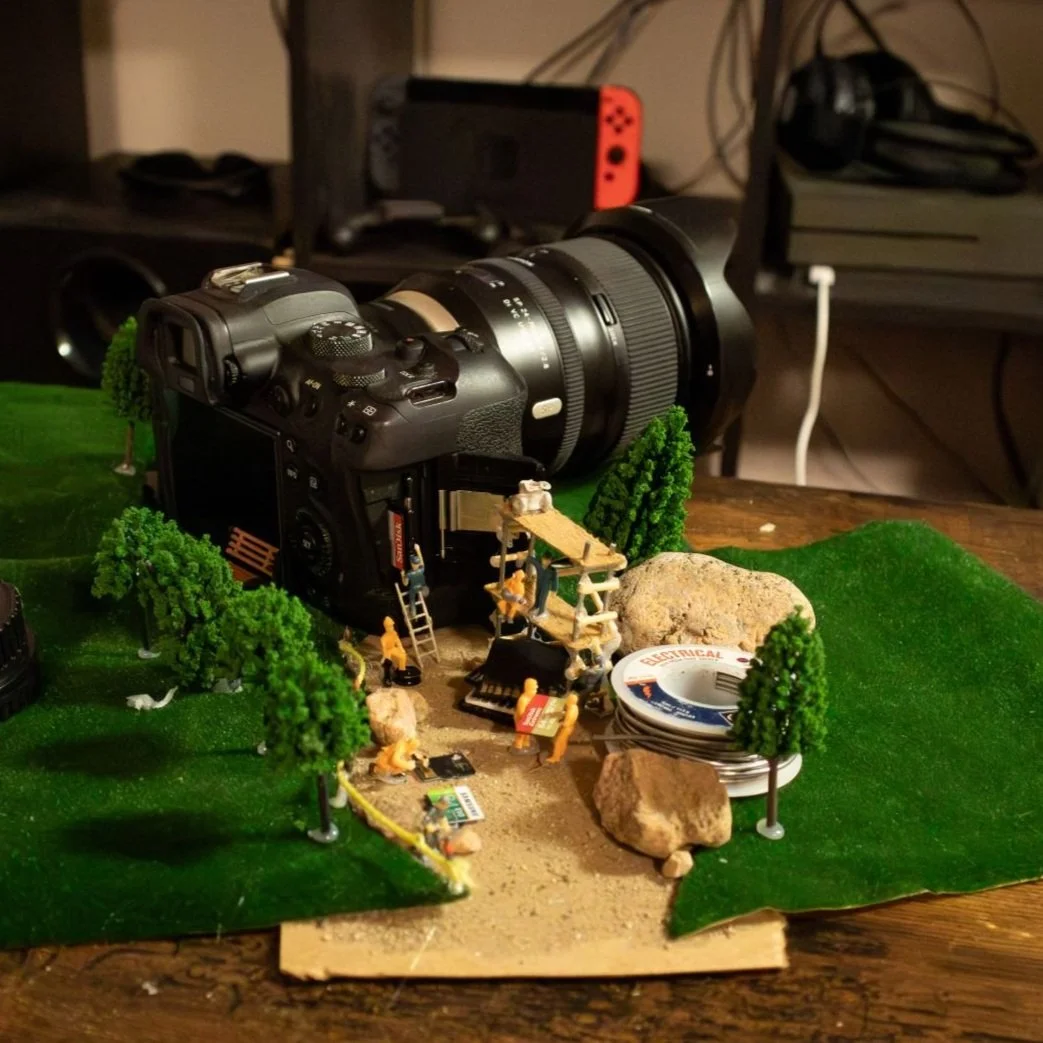
My original plan was to do this outside with the camera pointed at the sunset. This way the ground would not just be a table, and it would look like the camera was ready to take a picture of a beautiful sunset as soon as the crew was done switching the SD card. Unfortunately, I was quickly running out of sunlight (stupid winter is coming at the time of writing this) and I decided to pivot to an indoor set so that I wasn’t too rushed. I still didn’t want a regular table to be the ground so I used some rolls of fake grass that came with the mini figures and used a piece of cardboard with gravel on it as the ground of the construction site. For this is just completely coated the cardboard with glue from a glue stick, then threw gavel onto it until the entire thing was covered. That, plus a few small rocks did the trick.
Posing The Figures
Next was the hardest and most frustrating part of the entire process, posing the figures. For context, I am a large person, 6’5” and clumsy. I did not anticipate the amount of dexterity that would be required to move these tiny figures into specific positions. The most important worker was one up on a ladder, looking like he was sliding and SD card out of the camera to be replaced. This guy was actually pretty easy since I could glue him to the ladder and lean it up against the camera. There were, however, 2 figures holding their arms out and I really wanted them to be carrying a micro SD card together like they were moving materials around the site. The gravel on the cardboard “ground” made it impossible to glue them down (I tried many times) so this was a very precise balancing act. This is also the point at which the hot glue came back to haunt me in a major way. after all of the gluing I had done, there were many invisible strands of glue connecting everything together like an awful spiderweb of my own unintentional creation. I would snag one of these strands with my finger, and it would pull all of the figures out of position and knock the micro SD card out of the workers hands, starting over 10 minutes of meticulous, infuriating work. I won’t go on forever about this, but believe me, I would love to. I did eventually get everything into position and could move on.
I finished up the scene by adding some fake trees, some extra SD cards as “construction materials” and some tiny q tips meant for cleaning a camera, connected together with yellow string to form a line of “caution tape”.
Crafting The Lighting
The last step was to set up lighting and take the picture. It was nighttime at this point so out come the flashes. This part got kind of technical so strap in (or skip to the next paragraph). I wanted it to look like sunlight on a clear, sunny day. This meant no diffusers on the flashes because the light needed to be hard. The camera in the picture was my Canon R6 which takes great pictures and can handle very high ISO values, but unfortunately I do not own 2 of those. I took these photos on my Canon M50 which is a great little camera (great budget beginner camera if you’re in the market for that, it’s the camera I started on). It it has an APSC sensor (smaller than higher-end cameras) and does not perform very well in low light/with high ISO values. I like a little noise in my images, but there’s a limit. This meant the flash that was the “sun” had to be turned up a bit more than I would have otherwise to let the M50 stay at a low enough ISO. This introduced a new problem: the shadows were now incredibly dark. To combat this, I added another flash at a much lower brightness and a white bounce board, coming from the other side of the scene to fill in the shadows a bit. I did this shoot at my house, not in the studio, so I brought the equipment I thought I would need. This did not include 2 light stands. That’s fine, it just means I had to hold one of the flashes in my hand while taking these. But wait, it turns out the flash can’t be too close to the transmitter or it won’t fire. It’s kind of like talking directly into someone’s ear with a megaphone. Lastly, mu “sun” was lighting up the living room in the background, which would have made adding a fake sky (that was my plan) more difficult. I added a black bounce board as a background to make my life easier in the future. With all of this, I was able to get a lighting setup that I liked.
Editing

Raw file

Lightroom edit

Final edit
Now That I had the raw pictures, all that was left was editing. I love editing so this part is great. I typically start in lightroom to get the image looking where I want it as far as lighting and color goes, then I’ll bring it into Photoshop to finish. On this image, I did a lot of edits. First thing was adding a sky so it looked like they were actually outside. Then the hot glue came back to haunt me once again because it was visible EVERYWHERE. I spent a fair amount of time just going around and removing as much visible hot glue as I could. Then I added lights to the q-tip pylons and the lantern one of the workers was holding. I smoothed out the border between grass and dirt and added some haze around the construction site to look like dust in the air. One of my favorite additions were the sparks from the worker hammering on one of the micro SD cards. I also added some glow to the red “Sandisk” portion of the card being pulled out of the camera to draw attention to it and make it look like it was being powered by the camera or powering the camera, idk it just felt right.
And with that, the SD card construction crew was done with their work and could go home. If you made it this far, wow thank you, I figured I was talking to nobody. I get really excited about taking cool pictures and am so lucky to be able to spend my days bringing my weird ideas to life. I typically take pictures of real people, so go check out my portfolios if you’re interested!