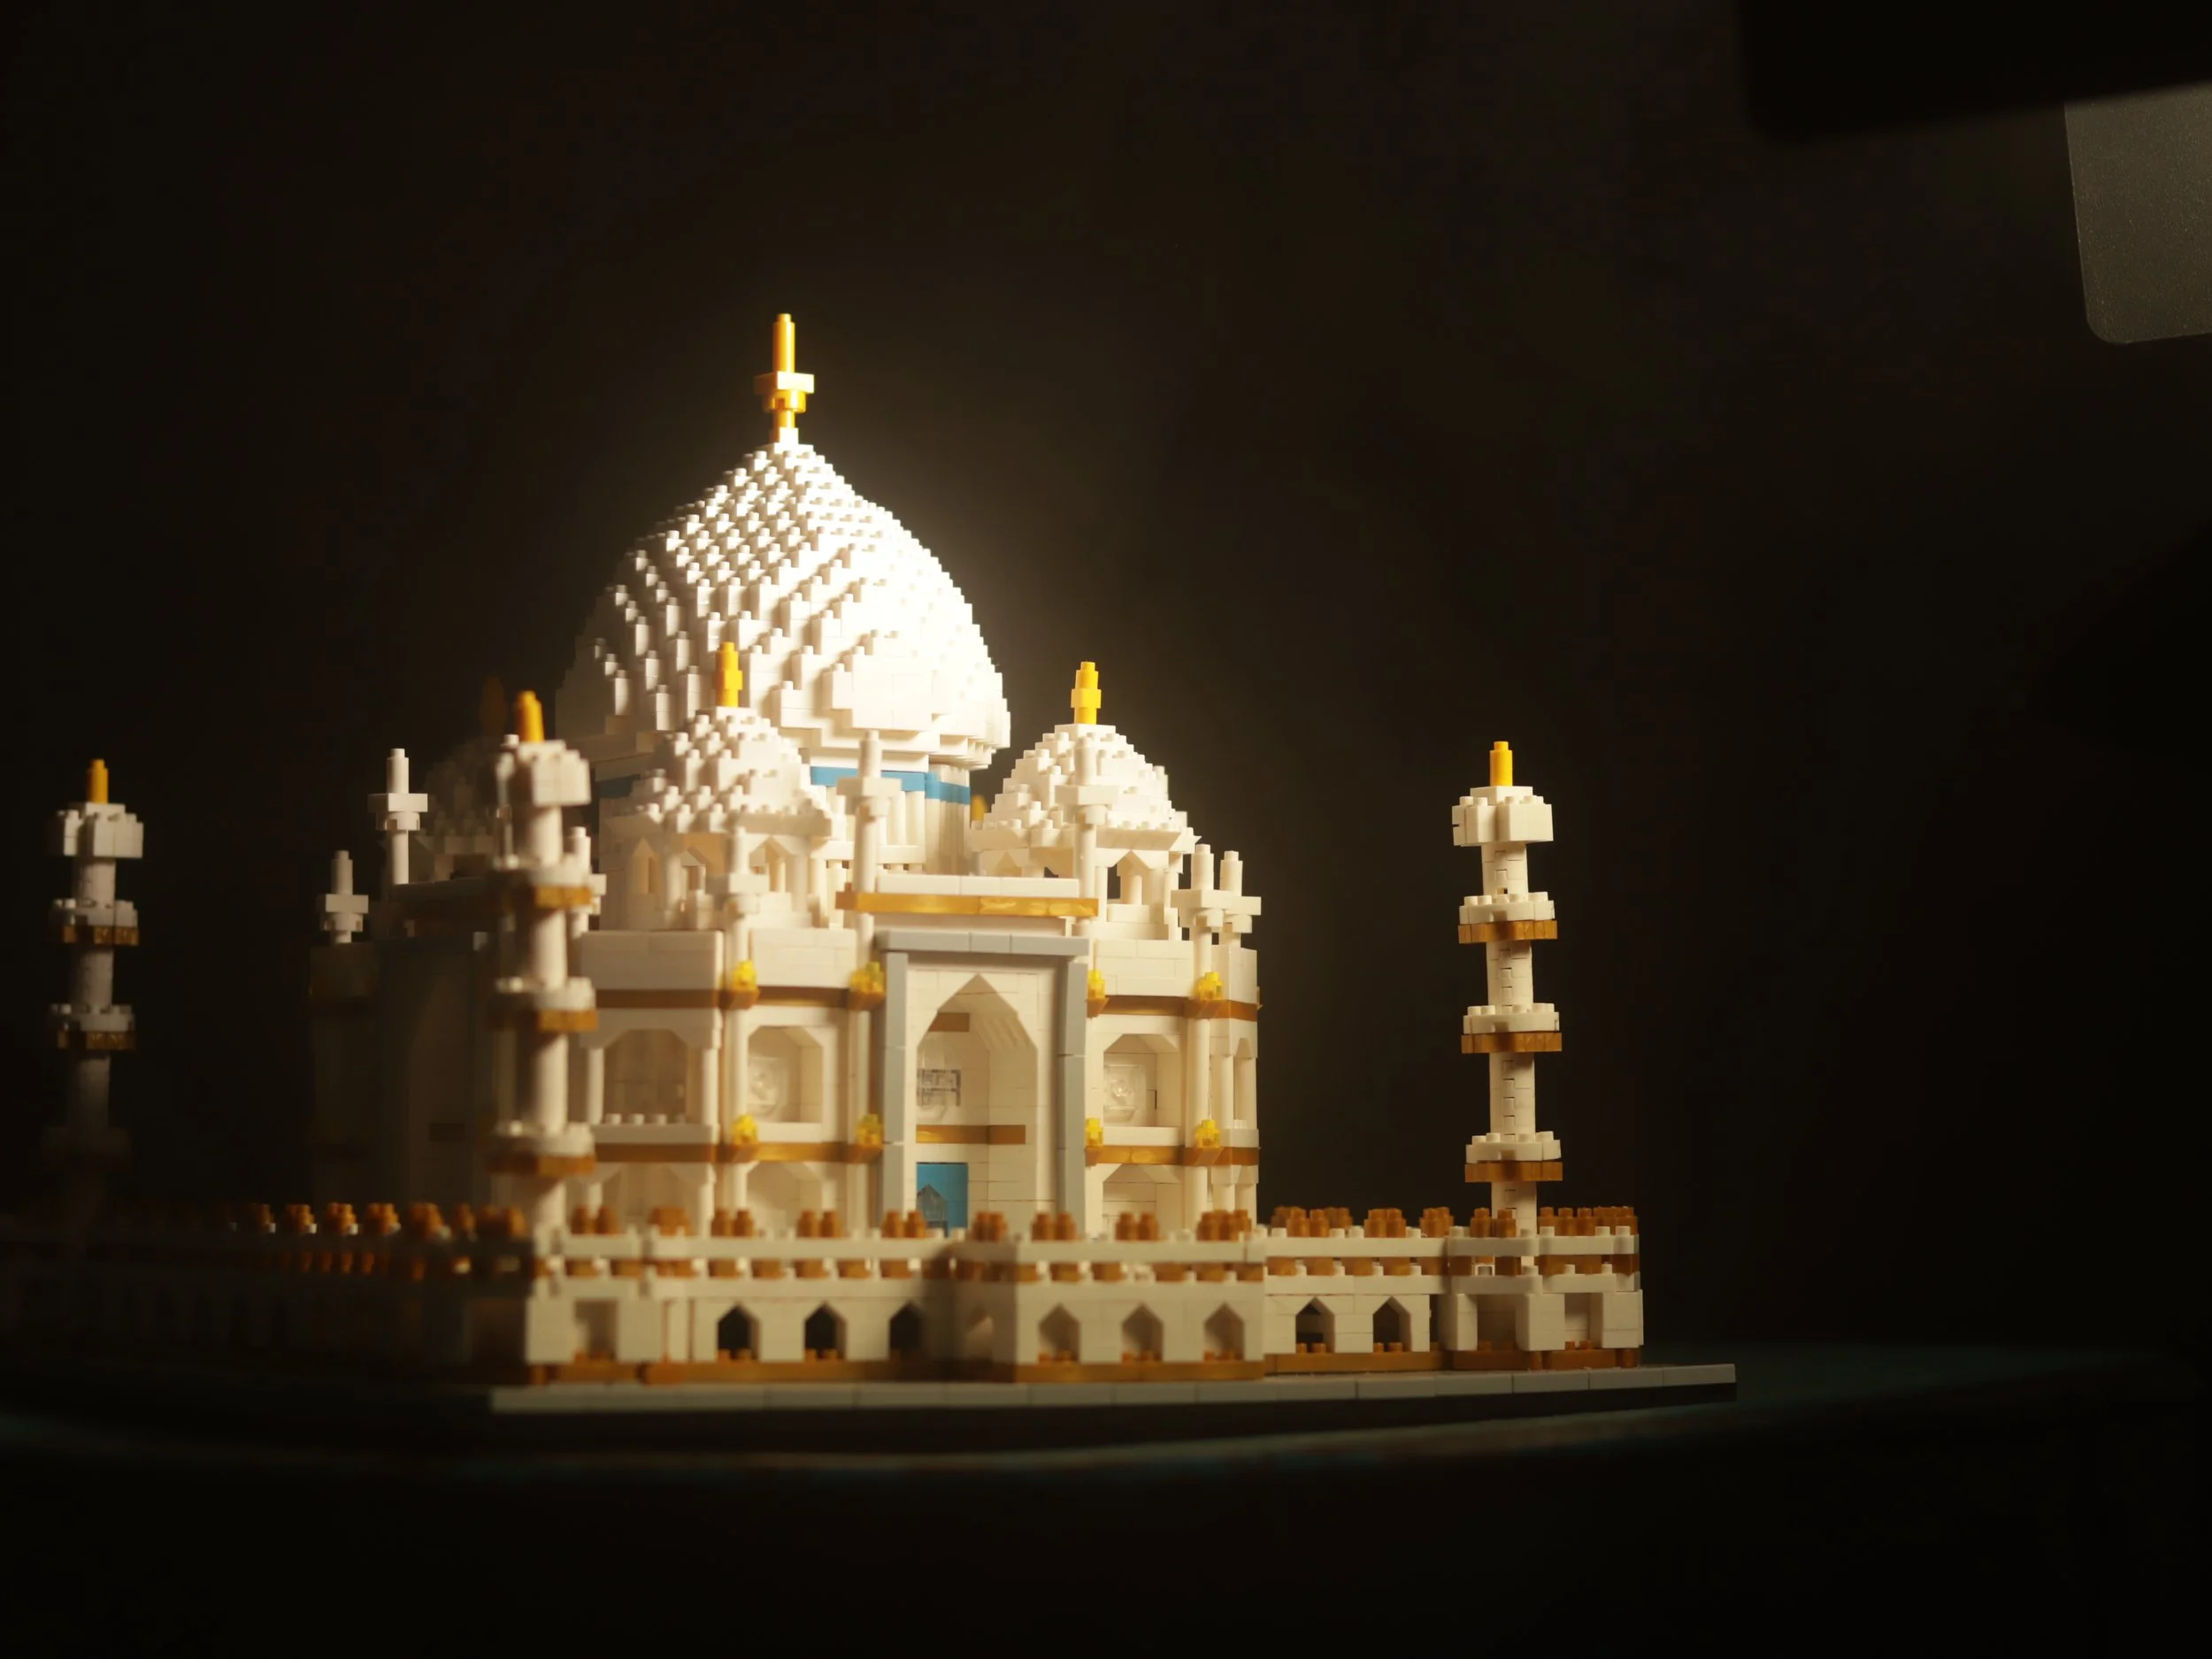
What I Learned From My Quarantine Product Photography Shoot
Christmas 2021 will be remembered for the Omicron variant of Covid. It was unbelievable how many people got it seemingly all at once. My girlfriend and I were among those people, officially testing positive on Christmas eve. So we were stuck inside for a while and unsure of how to spend the time. What we ended up doing was building a couple knock-off Lego sets (because Legos are way too expensive). The first was a model Taj Malah, clocking in at about 4,000 pieces and taking around 14 hours to complete.
I saw an opportunity to practice some product photography. This would be different from product photography of a watch or a jacket since it is a small model of a large, real-life building. I wanted a picture showcasing the set because it does look pretty cool, and I wanted to gain some more experience with product photography.
To start, I put the buiding on this blue barrel we had in the house and set up a white backdrop in front of a window.
My thought was that the window light would fill the white backdrop creating a “sky”, then I could put objects in front of the backdrop creating “mountains”. This would help give a setting for the building even if it may not be geographically correct. Unfortunately, the window light did not spread across the backdrop as I hoped, you can still see the shape of the window projected onto the backdrop. In addition, I started the process using a 14mm lens, thinking the short focal length would help make the building look larger than life and that the distortion at the edges would be a cool added touch. The big issue is with this lens, a huge amount of the background is visible and with the limited space in the room I set up in, that lens would not be feasible.
Switch to a black backdrop, add a key light, switch to a 50mm lens and…
Looking better already, but I still felt like it was missing something that really helped the photo stand out. My initial idea for this photo was to make the building look like more than just a toy sitting on the table. I wanted the viewer to be able to visualize themselves walking around the building as if it were life-size. I felt a good way to achieve that would be to add some haze to the photo. For this I would use a can of Atmosphere in a Can. A product I would highly recommend for any photographer.
Barely any change, What the heck!? It does make the building sort of glow in an interesting way, but nothing like I was picturing. The smoke was there, the camera just wasn’t picking it up. Maybe it was just not standing out against the black backdrop? My next step was to add a flash to the setup that would put a bunch of light into the smoke, helping it show up. I also noticed at this point that the left side of the building was way too dark. So i also added a light to that side of the set.
With this one I knew I was onto something. The smoke did show up, but it shows up evenly everywhere, making the black backdrop look more like a dark grey. I still wanted that contrast and darkness behind the building. The smoke needed to be more directional. Queue the final addition to the setup. A black reflector panel put right up next to the flash so that the light could only go straight at the building rather than spilling into the entire area.
Here is the final photo that I settled on. It is not perfect, but it is leagues above what I started with. These were all taken on the same camera, showing that building the scene and crafting the lighting are much more important than what equipment is being used. I was hoping to achieve shadow rays coming off of the corner towers and on the dark side of the building but think that would require lights more powerful than the ones I possess. This was an interesting scenario where I wanted very hard light as opposed to the softer light sources I usually work with. This scene needed hard shadows and very directional light that allows the smoke to show up, but not fill the whole scene. I’m excited to try more of these setups and learn more tricks for achieving different visual effects.


